
I was recently contacted by a new client who wanted to install Parallels Desktop on his iMac. I replied to him providing a couple of alternatives. One of the options was to use the Parallels Desktop solution he had suggested, and the other was to use the Mac’s built-in utility Boot Camp. These are by far the two most well-known options for someone who wants to run Microsoft Windows on their Apple Mac computer. But these are by no means the only ways to run Windows 10 on a Mac. In my IT support business, I always like to be able to offer clients a number of alternatives for what they would like to accomplish.
Parallels Desktop is the most popular means of implementing what’s known as a virtual machine on a Mac. Virtual machines are widely used in computing environments today and are a means of running a ‘computer within a computer’. A virtual machine runs in a window within the host operating system and provides the functionality of an actual computer. As a result, a virtual machine can be used to implement a desired operating system on a computer which is running an entirely different operating system.
The Parallels Desktop product has been designed specifically for the purpose of running Windows on a Mac. It’s extremely straightforward to implement as you are walked through the required steps during the setup, and you don’t need to know the ins and outs of all the technical details. However, Parallels Desktop isn’t free of charge and different editions are available for different purposes.
A number of alternative virtual machines are available for use on a Mac. None of the others are designed specifically for the purpose of running Windows on a Mac, and so they require a little more technical understanding. Some of these VM’s are free and others require the purchase of a license.
One of the most popular virtual machine products, and not solely for the purpose we are describing here, is Oracle’s VirtualBox. This particular product is completely free of charge. The software is open source and can be run on computers with various host operating systems. It includes numerous features and options, which permit you to tailor its functionality for your desired purpose.
In this setup guide I shall describe the steps involved in using Oracle VM VirtualBox to get you up and running with Windows 10 on your Mac computer.
The first step in the procedure is to download VirtualBox and install the software on your Mac. You’ll also require a Windows 10 installation ISO file which is available to download from Microsoft. You should copy this file to a flash drive after downloading it.
Once you’ve installed and launched the VirtualBox software, you will see the following screen. Click on New to get started.

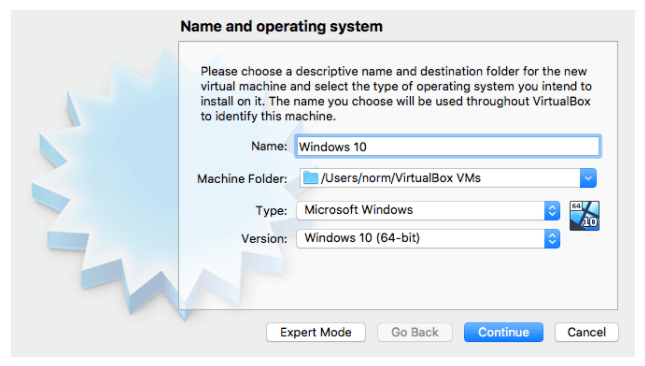
In the following window, provide your new virtual machine with a name, then click on the arrows beside Version: and scroll to select Windows 10 (64-bit). Click Continue after selecting your version.
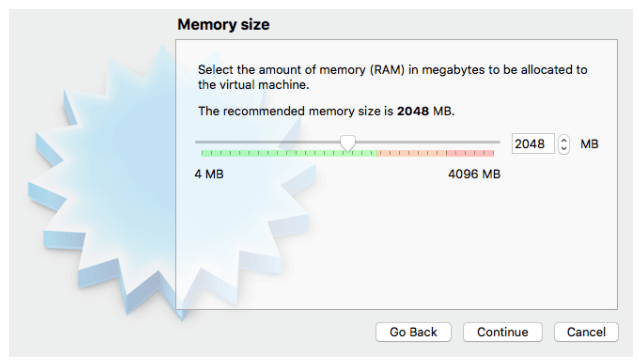
In the subsequent window, you can specify how much memory you would like to allocate to your virtual machine. The recommended size is 2048 MB but you may want to select a higher value to provide increased performance. It’s not crucial to make a final decision about the memory you require at this stage. You can alter the amount of RAM allocated to the VM at any time after creating it. Click Continue after you’ve selected the memory size you would like to allocate.
In the window which follows you need to ensure that Create a virtual hard disk now is selected and then click Create.

In the next window, select VHD (Virtual Hard Disk) and click Continue.

Next you have the option to select a dynamically allocated size for your hard disk, or a fixed size. A dynamically allocated hard disk file will only use space on your physical hard disk as it fills up, but a fixed hard disk may be faster to use. It’s fine to select the default option which is Dynamically allocated and then click Continue.

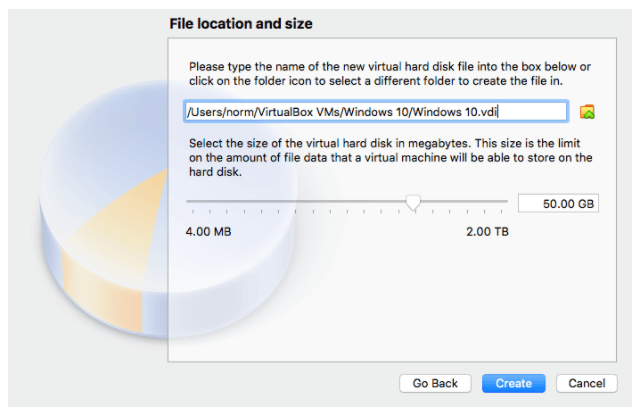
In the final window of the VirtualBox setup procedure, you can provide a name for your new virtual hard disk file and select the volume size of file data which the virtual machine will be able to store. Then click Create.
Your virtual machine will be created and you should see a screen similar to that shown below.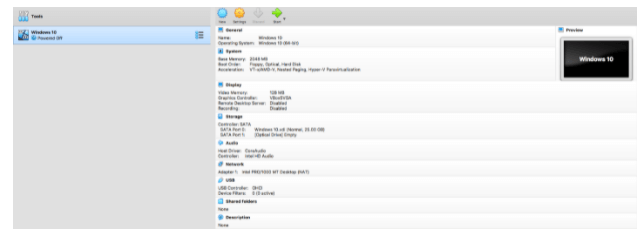
You’re now ready to launch your new virtual machine, and install Windows 10. Before proceeding, connect the flash drive containing the Windows 10 ISO file to your Mac. Having done so, ensure that the VM you created is selected in the left-hand pane and then click the green arrow labelled Start. In the window which appears, click on the folder icon to locate your Windows 10 ISO file on the flash drive and then click Start to proceed with the installation.

Your virtual machine should be initiated, and you will soon see the Windows 10 logo appear on the screen. Shortly after this you’ll be presented with the Windows Setup window where you can select your language, time and currency format, and keyboard. Click Next and Install Now on the following screen. From this point on just follow the steps to install Windows 10 in the normal manner.
After completing the installation of Windows 10 in VirtualBox, you can run it at any time by launching the VirtualBox app, selecting the Windows virtual machine you created, and clicking the green arrow to launch it.
The method described here offers a free alternative to running Parallels Desktop if you want to use Windows 10 on your Mac. Although VirtualBox is a generic product used on various operating systems, the steps involved in setting up your virtual machine are straightforward. By following the detailed steps described here you should be up and running within an hour or so.